In Year 2022 I was called-upon to install a MidMade attic ladder, LEX 70, Frame 56 cm x 118 cm. This would bring renewal of a broken relationship with supplier Conservation Technology, Baltimore MD, the only USA importer of MidMade wall hatches and attic ladders. I had previously purchased and installed five MidMade ladders, fancy LUX A1120 offered in only one frame size, 56 cm x 118 cm. I had purchased four wall hatches and of those still possess two as inventory. I had made small investments in superior Europe-made long-resilience gaskets for my own construction of hatches and the interesting remodel of my kitchen. I had purchased superior Tenoarm vapor barrier sheeting.
I have no regrets of trusting Tenoarm vapor barrier sheeting in most of the exterior walls of my home in mild Maritime USA Pacific Northwest.
It is safe that my walls will not pass air and attendant water vapor. Any moisture unlikely reaching walls volume will dry to the exterior.
Conservation Technology no longer sells Tenoarm, and for appropriate climates , this is a loss to home efficiency, health and durability.
I insulated and sealed walls inside closets too.
See use of durable double-backed butyl tape as backside bonder. See strategy of demolition still leaving reveal of original drywall at all edges, avoiding ruin of corners taping.
It was easy to run new data and power wiring via the attic, at revealed tops of wall framing
And here ends a diversion to all things adopted from importer Conservation Technology.
Never-Fail Features of an Attic Access Attic Ladder Installation:
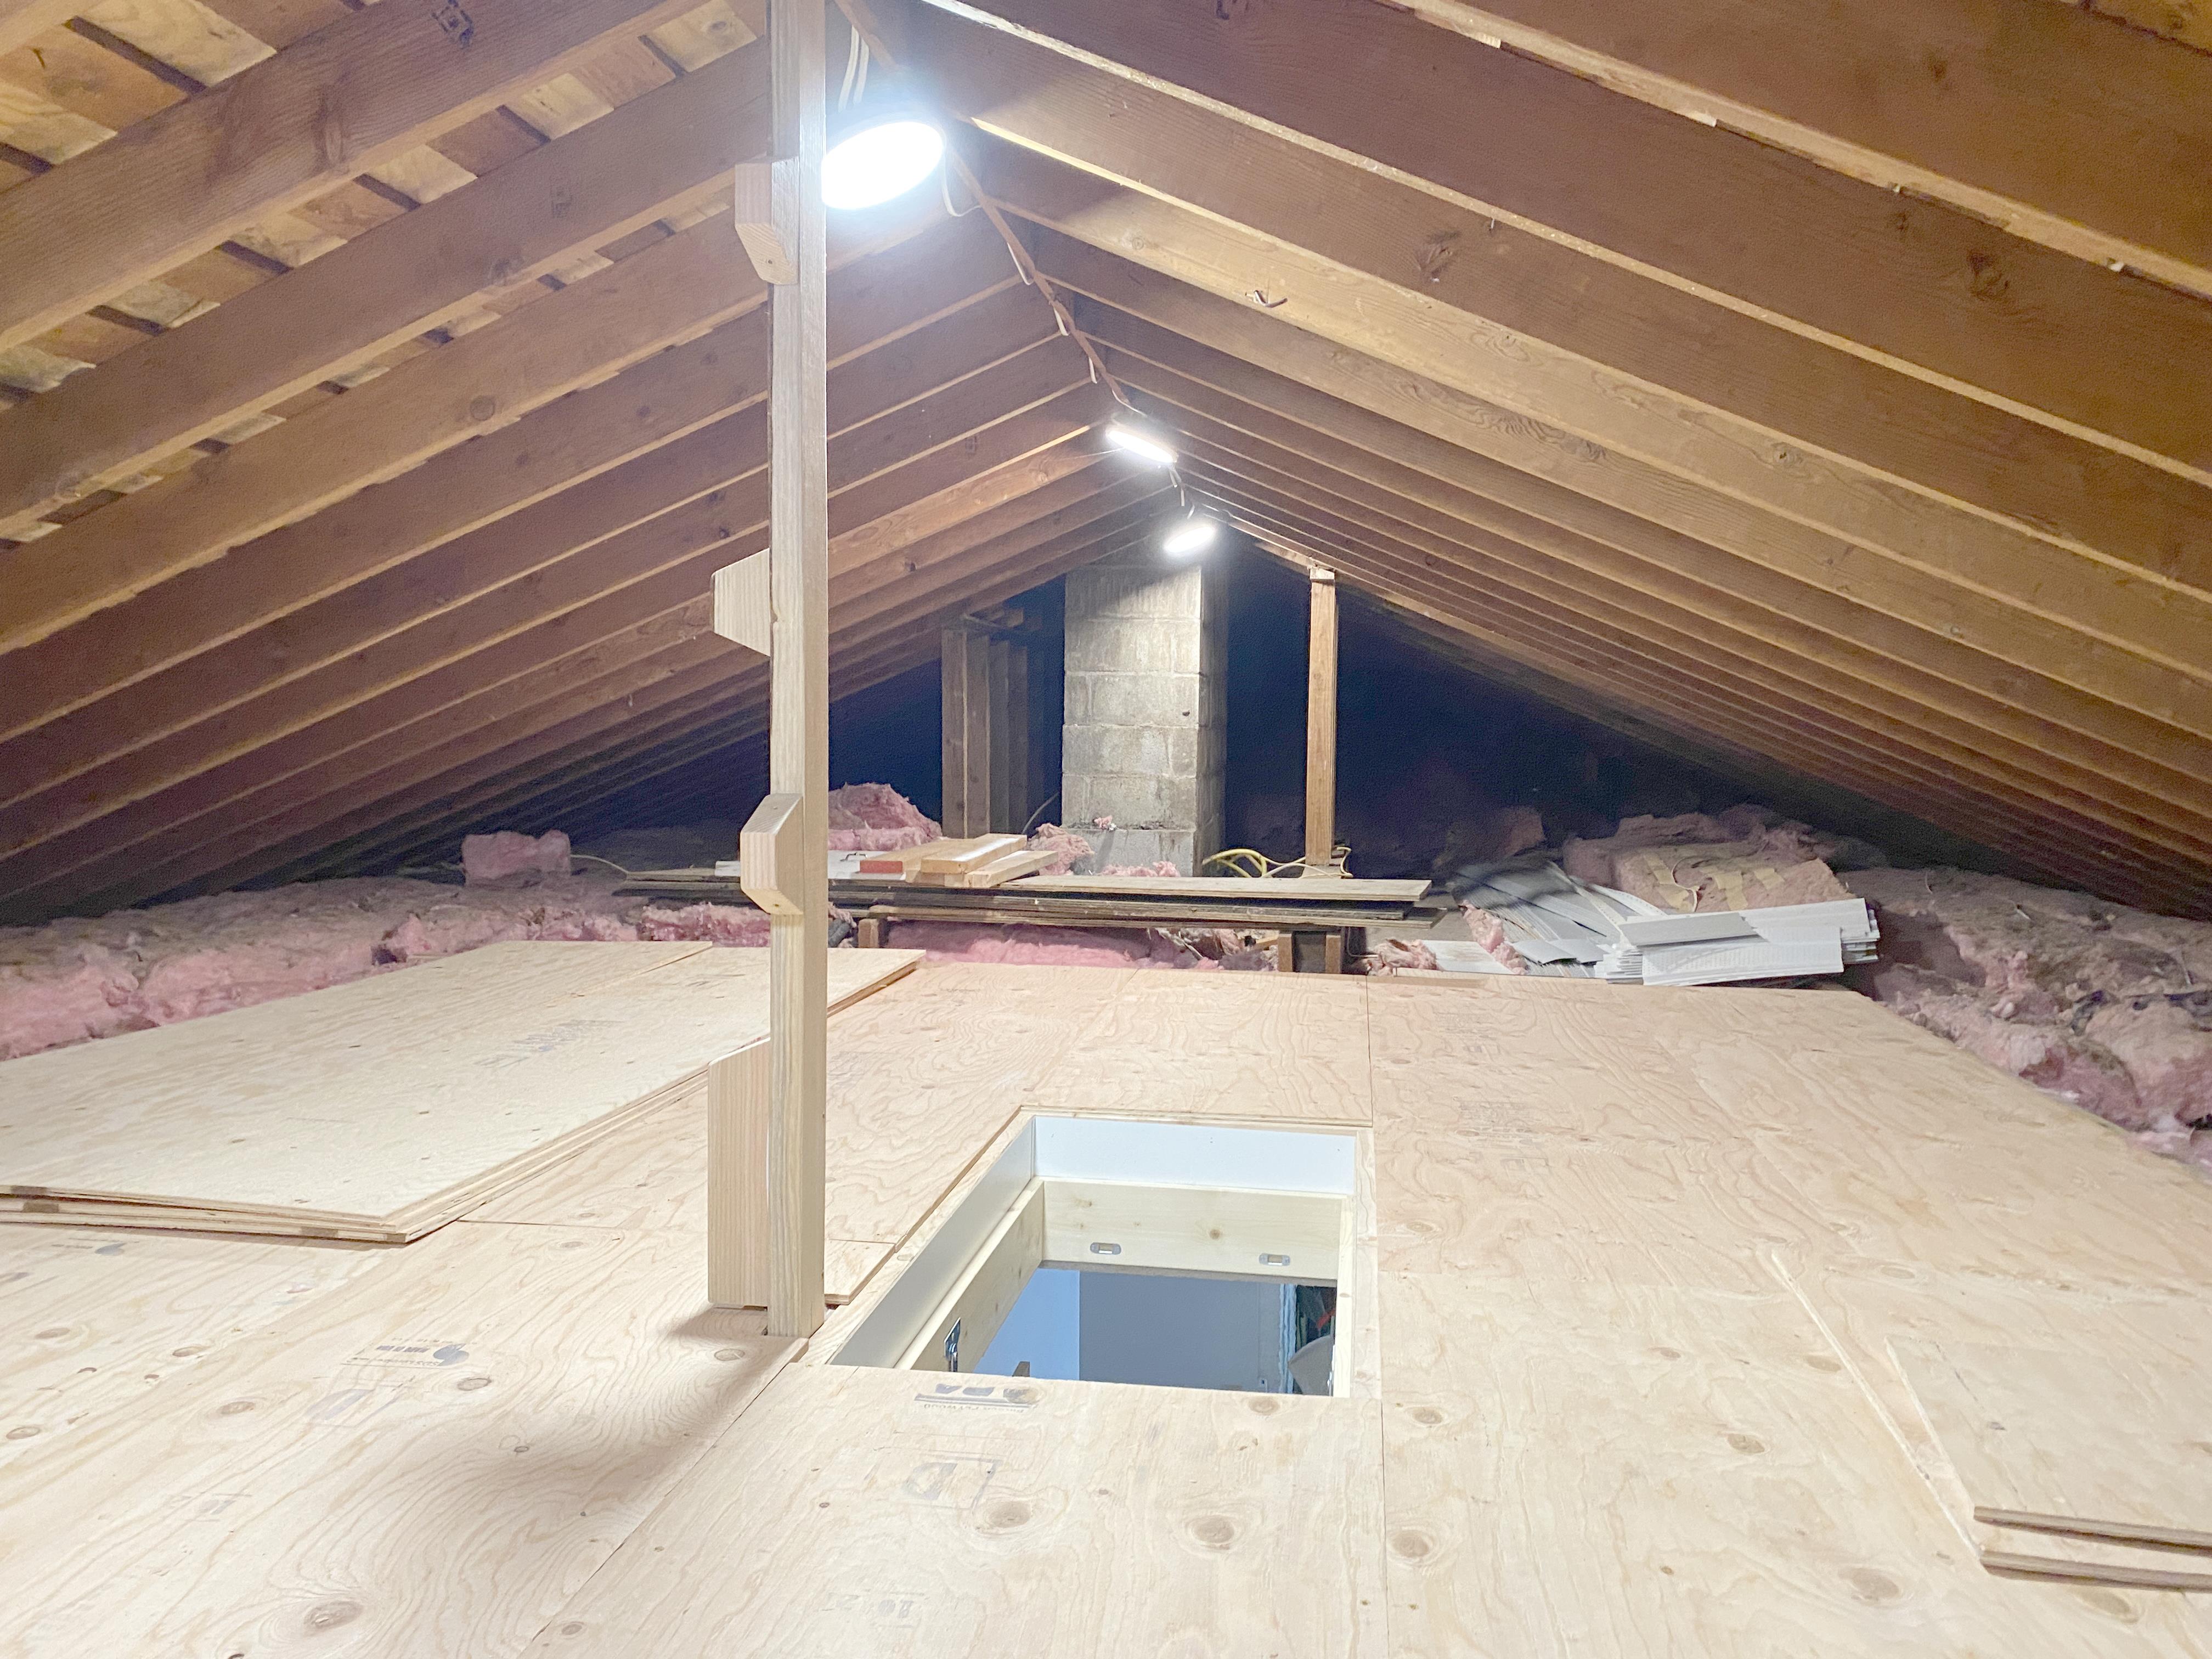
I install ladders with mandatory inclusion of every important safety measure I have imagined. A safety pole guides one from and to the ladder opening. When beyond reach of a ladder handle. always have your weight borne by a hand at a sequence of safety pole grips. A safety pole is a selected pretty 2x4 rock-solidly bridged between floor joists and roof joists with three or more hand grips, and with power and lighting control attached. Safety is priceless, and affordable.
This is my MidMade job-in-process at late-December 2022, I keep divots of the plywood flooring cut about the ladder nearby, and set them to cover the hole while working distant from the ladder.
A lighted switch, readily visible and at-hand, greets the attic user.
The ladder is MidMade LEX 70 22/47, manufactured in Northern Sweden sheltered workshops, by handicapped, talented workers, with superior, knotty, non-splitting Norway Spruce, from local forests.
The work of a competent installer can include much custom assembly specifically suited to the unique opportunities in any home.
My safety measures are original as far as I know, not offered by any other installer, and yet are extremely important. One measure is deployment at default 60° steps angle. This is improvement from the unsafe default, out-of-the-box 70° for this MidMade ladder. Added hinging in the center section is needed to achieve the safer angle.
Here watch YouTube video of my deployment at 60°, with a very similar ladder.
Perfectly ordinary. Nothing to it, once imagined, for me.
These are the conditions upon destruction of the found drywall-plunker access at the January 2023 Midmade ladder.
Planning comes of much experience and fresh tactical thinking. The accurately-fit "hole" will be in a strong, completely rebuilt floor.
Here I am standing on the ladder, looking at the finished attic.
In the attic, looking back at the ladder, at left see three more matched sets of plywood 24" rips intended for further flooring progress. At right see the divots of the flooring cut for the ladder. Further progress is daunting. Upright 2x4s outboard of the chimney defy easiest passage. More lighting is needed. Reserve long strips of the home's vinyl siding are obstacles, that may now move onto flooring.
This is the attic ladder as received from USA seller Conservation Technology, in Baltimore, MD. Packaging and instructions indicate that the ladder is ready to use, when nailed into the miraculously-produced ceiling hole.
Stuff the unboxed ladder in the attic, and place it in the hole, with the door face resting on propped supports. Anchor the ladder frame with a few nails and remove the supports. Open the door.
Just lop off excess of the lower step section, and you're done!
Untrue!
Working with ladders never seen before, I indulged in several months of measuring, drawing, studying, thinking and trials. My detailed planning employs precise 2D graphics drawn in Adobe FrameMaker at v5.5.6, which I have owned and have daily employed for about twenty years. Circa 2002 the dotcom crash crushed a maker of CRT displays, in Beaverton, Oregon, and I acquired this miraculous tool for about $100. Bloated newer versions are useless to me. FrameMaker 2019, better only in faster 64-bit operation, might be purchased for $1100. Adobe wants, even demands, that I upgrade to a subscription at $39.99 per month, current version 17. In a thirty day free trial of v17 I couldn't accomplish anything. The graphics tools are not valued at Adobe, and are ruined.
Here is the site planning graphic in FrameMaker The imported Google Maps satellite photo has overlay of precise details of floor framing and all of my construction. All drawing is with the two simple palettes caught in the Snagit scan. The tools in FrameMaker 17 are horribly complicated by pulldowns and such for the likes of needlessly choosing between dozens of arrow shapes.
Here again are the v5.5.6 tool palettes with drawing of improved ladder deployment, all hardware drawn at scale and noting the pinning of object groups. The ladder is much-improved beyond imaginings of a few naive inventors briefly employed a decade ago and not reimagined since, until I came along. With mid-splitting of the center section of a three-section ladder, adding hinges as a four-section ladder, limit arms and pivot positions are adjusted for deployment at a precise 60°. My reimagining of the ladder if the factory would cooperate for future production, would include elimination of what I consider a dangerous, trick, top step. I demand a broad top step for user safety. Here a probing foot reaching out backward for descent, often first finds the pointy tops of the side rails. The danger is avoidable and the solution all-around has design and seller inventory-control advantages. There is no factory engineering staff to cooperate in this. So, just let me do the work? It is already done.

The as-shipped (default) ladder deploys at a too-steep 70°.steps and door angle, and I consider that unsafe. The steepness is needed for the deploying steps to clear the ladder frame. This ladder is assembled with too-small screws as if with intent an installer would rearrange things, then setting appropriate screws. European rule EN 14975 states that steps angle should not be steeper than 61°. Do not defy this rule! Be grateful for means of compliance I offer, with added hinging.
Please see many issues of imperfect assembly of the default ladder. With this, then grant that improvements are just that. Intelligence added for the end-user must only reduce manufacturer liability, not affecting the manufacturer warranties. The upper step section is cleverly bonded to the door via wood crossbars that reach out to the strong wood of the door edges, awkwardly. The lower crossbar is high up on the door, for no good reason. I will apply common sense to move that crossbar and its brackets, also replacing screws that are needlessly short. I will apply long and strong deck screws to engage the rough frame at limit arm upper pivots, at the upper attachment for balancing springs, and at all arbitrary captures of the ladder frame to the rough frame. I stand behind the ladder and its assembly, for as long as I am still walking, with proper insurance. My best insurance is that customers should never have an accident, and that they are gratefully aware of safety measures that I invent and that they must not refuse. Least-steep angle, handle(s), safety pole(s), ladder placement to step toward with momentum to maximum attic headroom, and more. Few people think the installation of any interior door is simple DIY. Fewer should think an attic ladder is DIY.

Added hinging is required for angles less steep than 67°. For 96" floor to ceiling distance, the four-section deployment does not require "tenting."
Placing the ladder opening over a door frame below was a new challenge. Facing the need to close the hole in a two day binge of effort, I found it necessary to tilt the door frame out of the way, with temporary removal of the door. Armed with chiseling tools at my next visit, I would then reset the frame with trial and error, perhaps moving the frame. I did that cheerfully, resetting the door easily, with much-improved fastening and alignment, in further practice of best methods, taught by Gary Katz.
See the simple beauty in frameless trim, with nearly-invisible gaps between ceiling drywall, and the pretty-white durable finish of the ladder door.
Needed door trim then, often of ugly and cheap material, poorly fit, only conceals energy-leaking large gaps.
I do much better, with the ladder nearly invisible. It is a big deal. Important invention!
All the planning and hard work result in an attic that is accessible.
Good things happen up here.
It's not about storage space for most of us. Here an electrician, with my work nearly done, safely fixed a list of photographed, not yet covered DIY wiring crimes.
HVAC linesets are safely buried, intimately shrouded by batt insulation, under the flooring.
At and beyond a house-central large chimney, much is left dark and dangerous.
Passageways for many mouse families are still a problem.
Elapsed time for the work; thirteen days.
102 hours of on-job labor.
$1625 materials, my cost.
Invoiced $3625, me then netting $20 per on-job hour, with yet no compensation for 876 miles and twelve hours of travel to this exotic location.
My weatherization work and business practices are an ever-thoughtful experiment and have worked well enough that I have stayed at this for eighteen years. Soon age 79, I must wish to beneficially franchise the work globally, armed with useful owned URLs: AtticAccess.com, MidMade.com and more. I wish to team up with the competent USA importer of MidMade products, Conservation Technology, in Baltimore, MD, to avail architects and demanding home owners, of smart residence attic access and valuable improvement. We should agree that an attic is not a trash heap. It is an opportunity zone for easy gains of energy conservation and of providing security and data wiring, better ventilation, air conditioning and lighting of living spaces.
A $10,000 Attic Investment Makes Sense, Whether for Storage or Not
Many things we should preserve are tolerant of temperature swings. Yet, commercial storage of such is not less costly than conditioned storage.
Cumulative Payments
Kept 1 year: $1800
Kept 5 years:$9000
Kept 10 years: $18,000
A $4000 investment in attic access here, or even $10,000 for the full attic, with a lift mechanism, is so much smarter.
For most of us, in single family homes, floored R38 or R49 attic access is a good investment just for maximum weatherization, with friendly opportunity to maintain wiring, lights, fans, plumbing and HVAC. Insulation prone to ruin by access is a very bad investment.
Home Advisor says of fragile blown loose-fill: "You’ll spend between $0.25 and $2 for every inch of thickness per square foot (one board foot) or $1 to $5 per square foot total." Four inches of loose-fill coverage of half of this example attic (1000 sq ft) would cost $1000 to $8,000.
My very superior work invoiced at $20 per hour is far too much, a bargain. My work creates accessibility. The almost-universal loose-fill alternative is a cruel barrier to accessibility and usefulness.




No comments:
Post a Comment